 Welcome to the final part of our exploration of zines.
Today we begin the process of putting our zines together into what is known in the publishing industry as a ‘Dummy.’
We have all the raw materials.
You have the blank zine.
You have images.
You have the text in your comp books.
Now we begin the process of cut and paste.
 Back in the 1990s I worked as a designer on a newspaper in London. Our days were spent assembling the next day’s paper as a dummy, using more or less the same process we are going to use here with scissors and glue sticks. I worked on the Sunday edition. I often showed up to parties on a Sunday, and people would say, “Aren’t you supposed to be working today?”
I would have to tell them that we actually put the Sunday paper together on Saturdays.
 We actually had slightly more sophisticated materials, but essentially it was the same thing.
Nowadays everything is done digitally, but this is a really valuable learning experience, plus––and this is important––the way you put the whole thing together is a creative process every bit as much as the way you began writing.
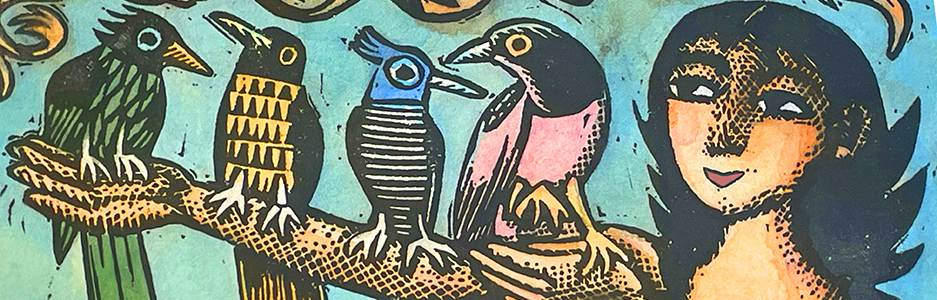
El Duende presides over cutting and pasting too.
 With computers it’s perhaps a little too easy to composite printed matter.
Plus––plus, cut and paste is very straight forward.
Digital compositing requires knowledge of the software, and this is not the class to learn––say––Photoshop or Pagemaker or InDesign.
Step 1:
I want you to loosely paste your materials into the zine. Just use a dab from the glue-stick. This way the assemblage will hold together, but you can easily pull it apart again without destroying you original zine.
For now, leave page one blank.
The Text.
You have hand-written the text into your comp book.
You now have several options.
You can cut the text out of the comp book and paste it in. Very simple.
You can re-write the text on a loose sheet of paper, then cut and paste.
The advantage of this method, is that you can make it the right size for the zine––you can also revise––you can neaten up your hand-writing too––and you can play around with the lettering––and you have the option of using a black pen, which will be best for printing.
The blacker the ink the better.
 The Text (part 2).
If your hand-writing is beautiful then, when you’re happy with your page plan, go ahead and glue the text in permanently on each page.
If your hand writing is not quite beautiful, then you are going to have to transcribe your text onto the computer, and print it out, before you paste it in permanently.
 The Page-Turn.
Try to surprise the reader where the page is turned.
Reveal something.
Build tension, or suspense.
You don’t have to begin a new page at a logical moment. You can break mid-sentence if it makes sense.
This is an interesting way to consider how you construct a sentence.
You might even re-write a sentence, just to break it across the the page-turn.
It goes without saying that you could do the same thing with a paragraph, or verse.
On the other hand, if you tease the reader a little you will keep them reading.
If you tease the reader too much they may quit.
 Next Up: Page 1:
This is the cover, so you need to think about a title as well as what’s going to be on the cover.
The Title.
The title should reflect what Zine is about in some way, or at the very least it should not mislead the potential reader.
In the 1960’s there was a movie titled THE LION IN WINTER. Thousands flocked to see it thinking it would be about lions. There was not a single lion in the movie. It was a historical drama about King Henry II of England. This matter was made worse by the fact that there were a lot of very popular lion films around at the time such as BORN FREE and the JUNGLE BOOK. Even worse it was a very good movie if you weren’t expecting lions.
The Title should pique the potential reader’s attention.
The Title should be concise––maybe two or three words, or even one word. That way the word(s) can be nice and big on the cover.
The Title could also be eponymous, which means that the title is the main character’s name.
 Author (which is you). If you’re not a bestseller-writer, then your name is probably going to appear smaller than the title. Also you need to consider how you’ll format your name. Historically, many women authors have used initials for their first names––often two initials. SE Hinton, JK Rowling, and PD James are some examples. This comes from the belief that female readers will books by both male and female authors, but male readers will only read books by male authors. So using initials disguises the author’s gender.
This is no longer really considered to be true. The majority of men don’t read books by anyone at all, and those that do will happily read books by female authors.
Or perhaps you want a Nom de Plume like Saki or Babara Vine (who is actually PD James).
If you’re going to change your name completely, don’t forget to let me know for the purpose of grading.
Also your parents may be a little upset.
 The final consideration is the image (if you plan to have one, and you don’t have to).
Once again you need something very concise and attention-grabbing. Something with one simple, dominant element, such as a face, or a hand.
Something Iconic.
The cover to the Thomas Payne pamphlet, A MATTER OF COMMON SENSE, would not be a good prototype in the modern age.
Begin the process by sketching out some thumbnails in your comp book. They don’t have to be neat, they’re just to give you an idea.
Do three or four, and show them around. Get opinions. Although, in the end you have to be the one to decide. Your thumbnail designs don’t have to be radically different from one another, they can just be minor variations on the same thing.
Your final task is publication. How are you going to print your zine? You don’t have to print it, but you’ve come this far and done all this work––and is a zine really a zine if it’s not published?
If you’re going to print it, then you’re going to be using a photocopier.
 The first step is to remove the staples and separate the folded pages (first make sure you can still see the page numbers).
You will notice right away that printing is not going to be totally straight forward.
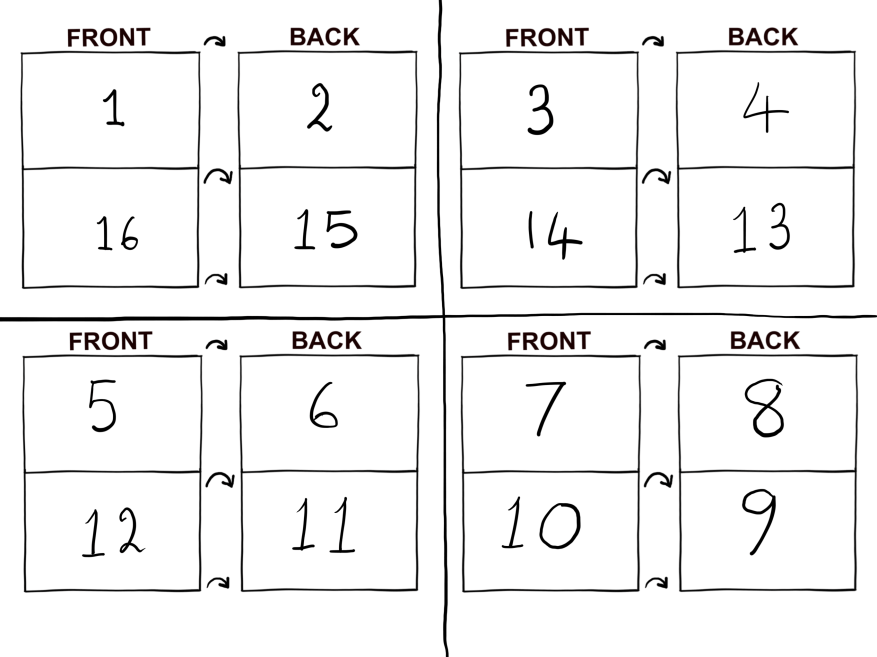 You are going to need a formula:
This is the formula by which you can make sure the pages print in the correct order.
Let’s call each pair of pages a spread, so the first spread is 1-16.
Fold spread 1-16 flat, and print it out as normal. You might want to print several copies of spread 1-16, as it needs a little trial and error to make sure its back-side (spread 2-15) actually prints on the back, and prints the correct way up.
Once you’ve figured out how to orientate each spread, then you can print the rest of the zine.
 If you have access to double-sided printing then it can make life easier, although you can still end up with the back-sides the wrong way round, so take your time.
Print as many copies as you can afford, and hand them out to your friends.
If you can’t print––or if goes all wrong, don’t worry. Just the dummy is enough for this class.
Use your phone to photograph your three favorite pages or spreads from your zine, and email them to me––preferably putting the 3 images in a single email.
